If you are exploring image to 3d, this guide explains when a photo should become a full model, a backlit lithophane, a raised relief, or an extruded logo for STL output.
The same photo can become a figure, a glowing panel or a raised tile, but those prints use the image in different ways. I choose the method by deciding how the finished object should look before I prepare the file.
The short version
- Want an object you can turn over? SupaVoxel’s image to STL generator predicts a full shape, including the back and sides. It suits figures and props, not dimension-critical replacement parts.
- Want the photo to appear when lit from behind? Make a lithophane. Its changing thickness controls how much light passes through the print.
- Want raised terrain or an embossed image? Make a heightmap relief. Image brightness sets surface height above a solid base.
- Want a crisp logo with straight sides? Extrude its outline instead of asking a photo-based method to interpret it.
Start with the object, not the file
“Image to STL” describes an input and an output, not a particular shape. An STL might contain a sculpture, a thin panel or a tile with raised contours. All can go into a slicer, yet they answer different questions about the source image.
A full model asks, What solid object might this picture show? A lithophane asks, Where should this panel transmit more light? A heightmap asks, How high should each part of this surface rise? None is a substitute for the others. A pet portrait can make a recognizable lithophane without providing any information about the pet’s unseen side. A terrain map can produce a precise relief without describing an object that could stand on its own.
I make the choice by picturing the print in use. Will someone hold and rotate it? Will it sit in front of a light? Or will they read its raised surface under ordinary room light? That decision tells me which image to prepare and what to inspect before printing.
Choose a full model when the subject needs a back
For a toy, animal or decorative prop, a flat plaque may miss the point. The full-model method interprets the pictured subject as a volume and predicts the surfaces the camera could not see. A slight angle helps: it reveals more depth than a straight-on view. A clear picture of a single subject is more useful than a crowded scene, and a pose with limbs close to the body is less likely to leave fragile printed parts.
The trade-off is that prediction is not measurement. The back is invented from the visible evidence, and fine features may soften at print size. I would use this route for a display figure, but not for a bracket, a replacement knob or anything whose holes must fit existing hardware. Those jobs call for measurements and CAD.
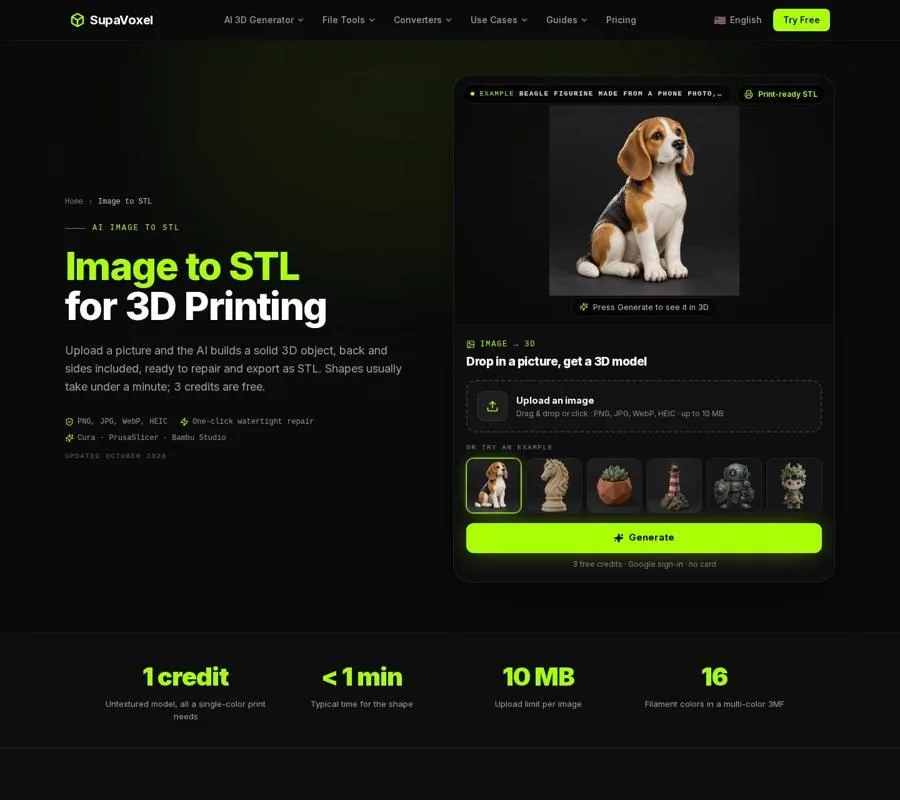
The Image to STL page is the full-object route, rather than a brightness-based panel or relief.
The generator accepts PNG, JPG, WebP and HEIC images up to 10 MB. An untextured shape costs 1 credit; new accounts receive 3 free credits at sign-up. Direct STL export is on a paid plan, while free accounts can download a GLB. If I need the studio’s one-click watertight repair before export, that print-prep feature is included in every paid plan from $25 a year.
A closed mesh matters because a slicer needs to tell inside from outside. A hole, a loose shell or an edge shared in the wrong way can make that ambiguous; these are the kinds of problems behind a non-manifold warning. Even after repair, the print still needs a sensible orientation, support where parts overhang, and a size set in the slicer. STL does not carry real-world units, so I never treat its opening size as a measured dimension.
Choose a lithophane when light should reveal the photo
A lithophane keeps the image as an image. Thin regions let more backlight through and appear bright; thick regions block more light and appear dark. Unlit, the print can look like a faintly textured panel. That is normal, not a failed conversion.
SupaVoxel’s free lithophane maker lets me crop and adjust a photo while checking a backlit preview, then export a flat, curved, lamp, circle or heart shape as STL or 3MF. It runs in the browser without uploading the photo. I use it for a portrait or scene that should remain recognizable as a photograph, rather than become a guessed sculpture.
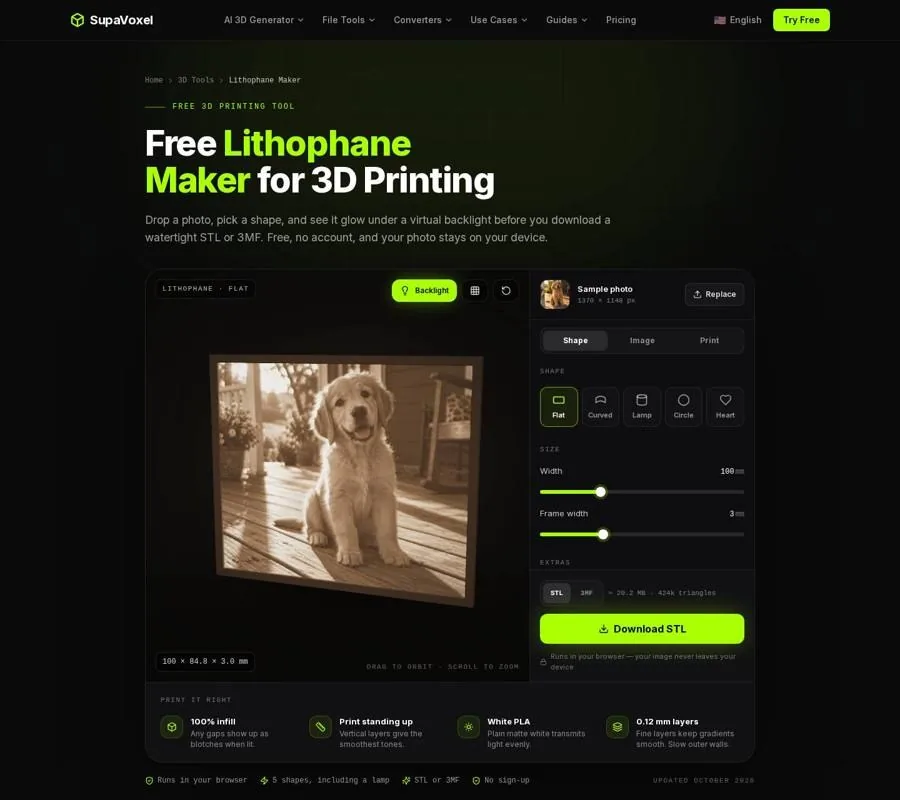
The Lithophane Maker page includes a backlit preview for judging the image before download.
Contrast is worth checking before export. If the whole photo is dark, much of the panel will be thick and the result may look muddy against a modest light. If the subject is lost in a busy background, crop closer. The tool’s default thinnest wall is 0.8 mm and its default thickest wall is 3.0 mm; those values give the image a range of light transmission rather than merely a raised surface to touch.
Print the panel upright, as exported, so the layers form smoother tones across the image. For white PLA with a 0.4 mm nozzle, the page recommends 0.12 mm layers and a solid image area: 100% infill or at least 7 walls. Sparse infill in that area can show through as an unwanted pattern when the light goes on. A tall panel may also need a brim to stay planted while printing.
Choose a heightmap when brightness means elevation
A relief is meant to be seen by reflected light, not transmitted light. In a heightmap, white rises and black stays low; intermediate grays fall between them. This is a useful rule when the source really represents elevation, as a terrain image or depth map does. It is less literal with an ordinary photo: a bright shirt rises and a dark eye sinks, even if neither is physically higher.
The free browser-based heightmap to STL converter turns that brightness map into a rectangular or circular relief on a solid base. It offers crop, contrast, gamma and smoothing controls, plus an Invert option when dark should be high. The STL or 3MF exports lie flat for printing. I would choose it for a landscape tile or stylized embossing that should read through shadows cast across its surface.
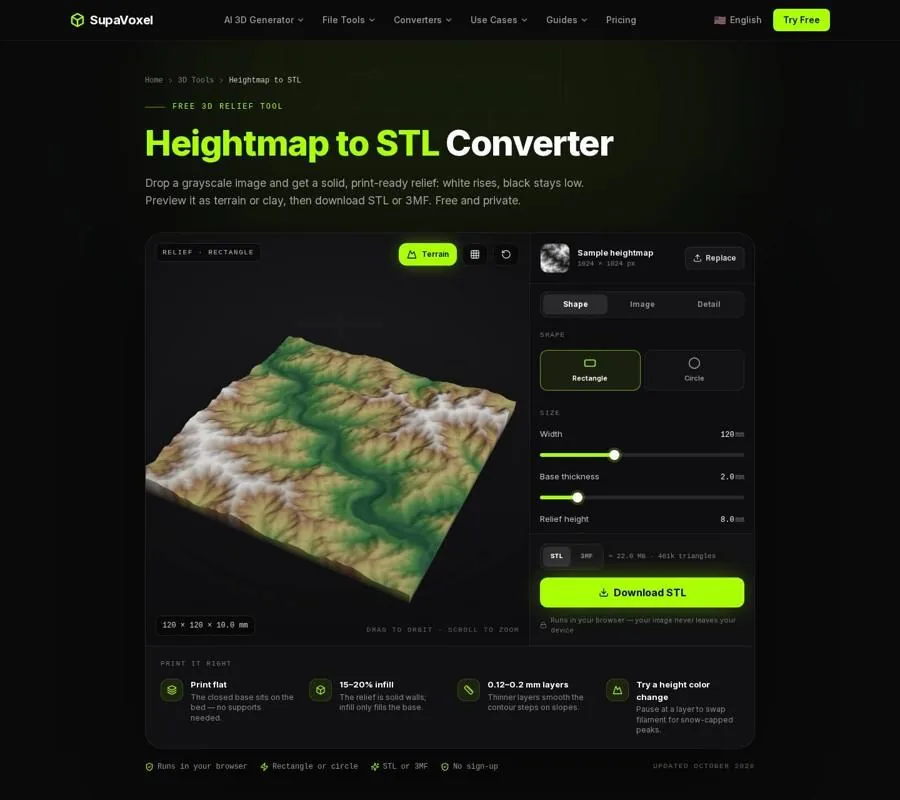
The Heightmap to STL page controls the relief surface and the base beneath it.
The base is important: without solid material beneath the high and low areas, a surface is not necessarily a printable object. This tool supplies that closed underside. Its default base thickness is 2 mm and its default relief height is 8 mm. I check smoothing if a compressed image produces little terraces, then use side lighting to judge the physical result. Front lighting can flatten the very contours I wanted to see.
Treat a logo as an outline, not a photo
A clean logo needs predictable edges. A full-model generator may reinterpret its shapes; a heightmap will raise bright regions according to tone; a lithophane will only reveal it properly with backlight. If the goal is a badge, sign or stamp, I start from the outline instead.
SupaVoxel’s free SVG to STL converter extrudes an SVG design, or traces a PNG or JPG, into a printable shape. It can make a single-color STL or keep colors as separate parts in a 3MF. That is a better match when the design’s silhouette matters more than rounded sculptural form.
Before using it, I convert live text to paths and check that thin strokes will still have printable width at the chosen size. An SVG can look sharp on a screen while containing details too narrow for the nozzle. Extrusion preserves the intended outline; it cannot turn a flat mascot drawing into a rounded character.
Make a print decision before committing
My final check is to name what the image does not know. A portrait does not show the back of a head. A color photo does not encode physical depth. A logo’s fill colors do not describe a sculpted surface. Once those limits are clear, the choice becomes practical rather than a contest between converters.
For a full model, I inspect the predicted back and fragile projections, then plan supports and scale in the slicer. For a lithophane, I judge the backlit preview and plan an upright, solid print. For a heightmap, I inspect the slopes and base, then print it flat. For a logo, I check outlines and feature widths. The right STL method is the one that makes the print behave as intended, not merely one that accepts the image file.
FAQ
Can a lithophane be displayed without a light?
Yes, but the photo may be hard to read. A lithophane relies on light passing through different wall thicknesses; without backlighting, it looks like a lightly textured panel.
Will a regular photograph make an accurate heightmap?
Not usually. Image brightness is not physical depth, so a photo becomes a stylized embossing. Use a terrain heightmap or depth map when elevation needs to correspond to the source.
Can a full-model generator make a part that fits another object?
Do not rely on it for that. It predicts a sculpture from visible evidence, including unseen surfaces. Measure and model a fitting part in CAD instead.